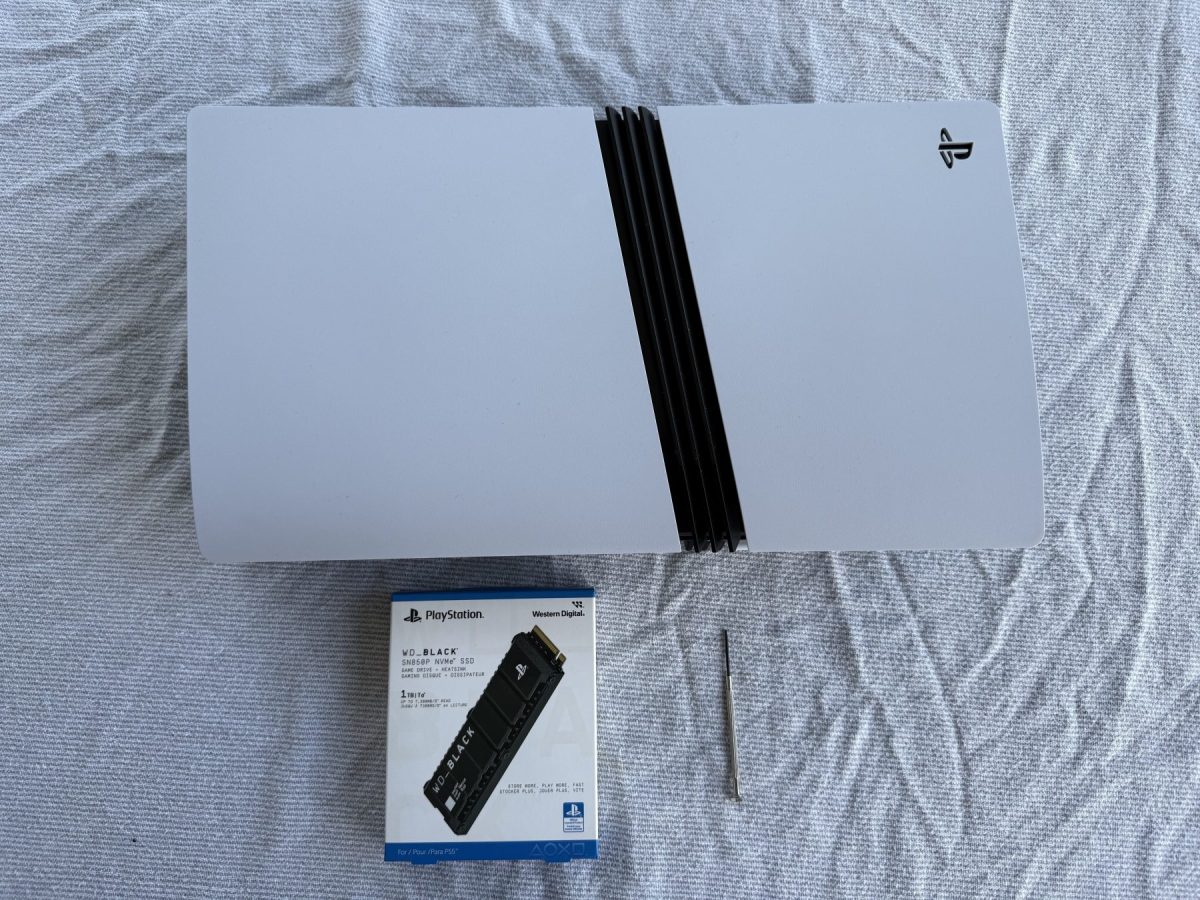
The new PS5 Pro is here with double the storage of the original PS5, taking it to 2TB. Unfortunately, I am (and probably you are, given you’re reading this) a digital hoarder and maxed out that storage immediately upon receiving my console. Because, sure, it took me less than four hours to download all those games, but what if the internet ceases to exist on the day I want to replay The Last Of Us Part II?
Luckily, like the amateur PlayStation 5, you can expand the storage of the PlayStation 5 Pro with an M2 SSD. However, to put that M2 SSD in, you’re going to need to remove the case and use a screwdriver. It’s easier than it looks/sounds, though and takes around five minutes.
How to install an SSD into your PS5 Pro
Read: PS5 Pro review – A real gut-buster for those who covet virtual beauty
What you’ll need:
- A PS5 Pro (unplugged from everything, particularly power, I cannot stress that enough)
- A clean, stable workspace (your recently vacuumed wood floor or a dining table are good choices, carpet is a bad choice)
- A small Philips head screwdriver
- An M2 SSD with heatsink. There are lots of options for these. For today I’m using a 1TB WD_BLACK SN850P NVMe SSD, because for me it strikes the right balance of speed and price (there are some that are faster and more expensive, others that are slower and cheaper), and also it’s adorable and looks like a mini version of the external drives. And I’m a sucker for a miniature thing that still works.
Step 1: Ground yourself
Touch a grounded metal thing to make sure you don’t accidentally static shock your PS5 Pro to hell. Then, grab your PS5 Pro and turn it upside down. To be sure that it’s upside down, orient it so the smaller part of the case is on your right and the HDMI port is facing you.
Read: The PS5 Pro really makes Kraven the Hunter’s chest hair pop
Step 2: Remove the plate
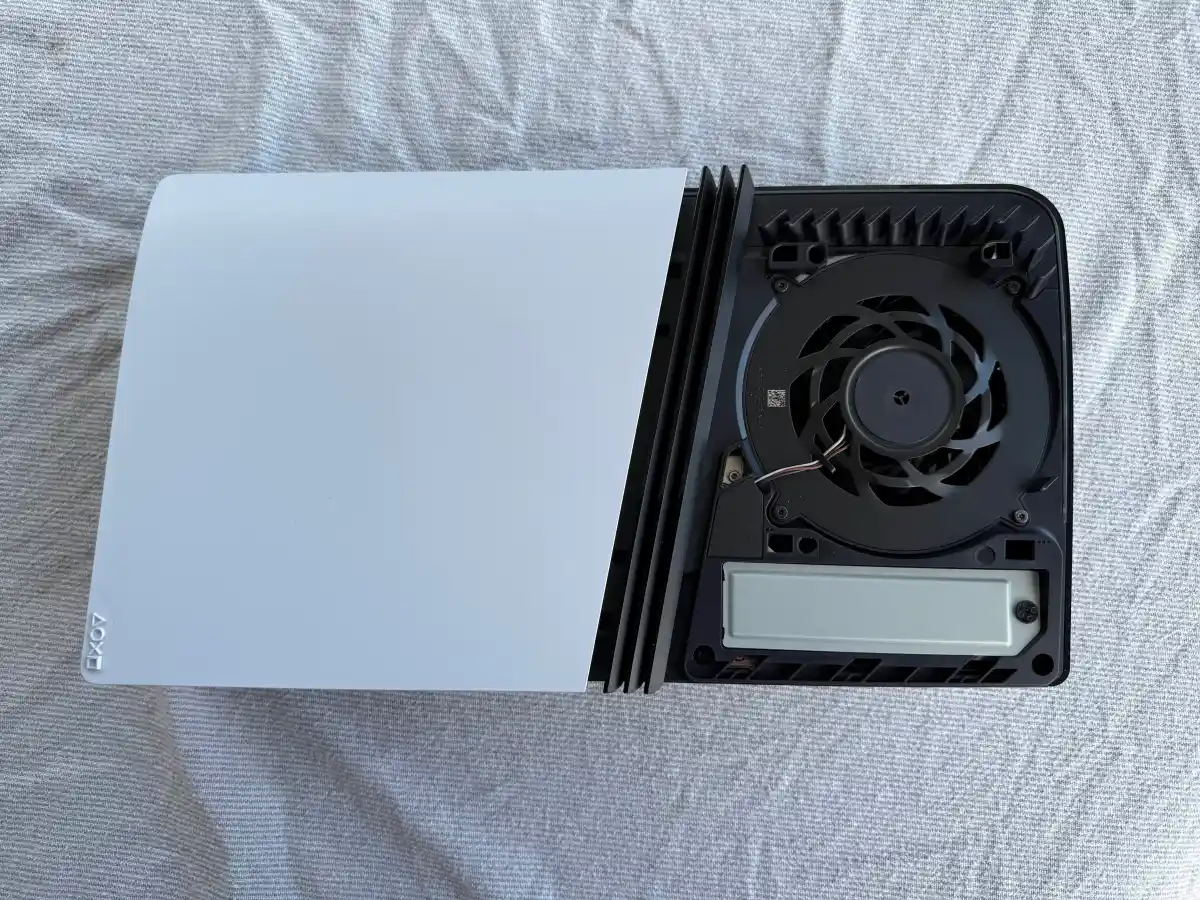
Remove the smaller part of the plate on the right of your PS5 Pro. The whole time that you do this, it’s going to feel like it’s going to break. It probably wont (but also please don’t blame me if it does, I don’t know how strong you are). What you do is grab the edge that’s furthest from you and pull towards you and up. It will take slightly more oomph than you think it should, and it will make a disconcerting noise when it comes off.
Step 3: Remove the screws
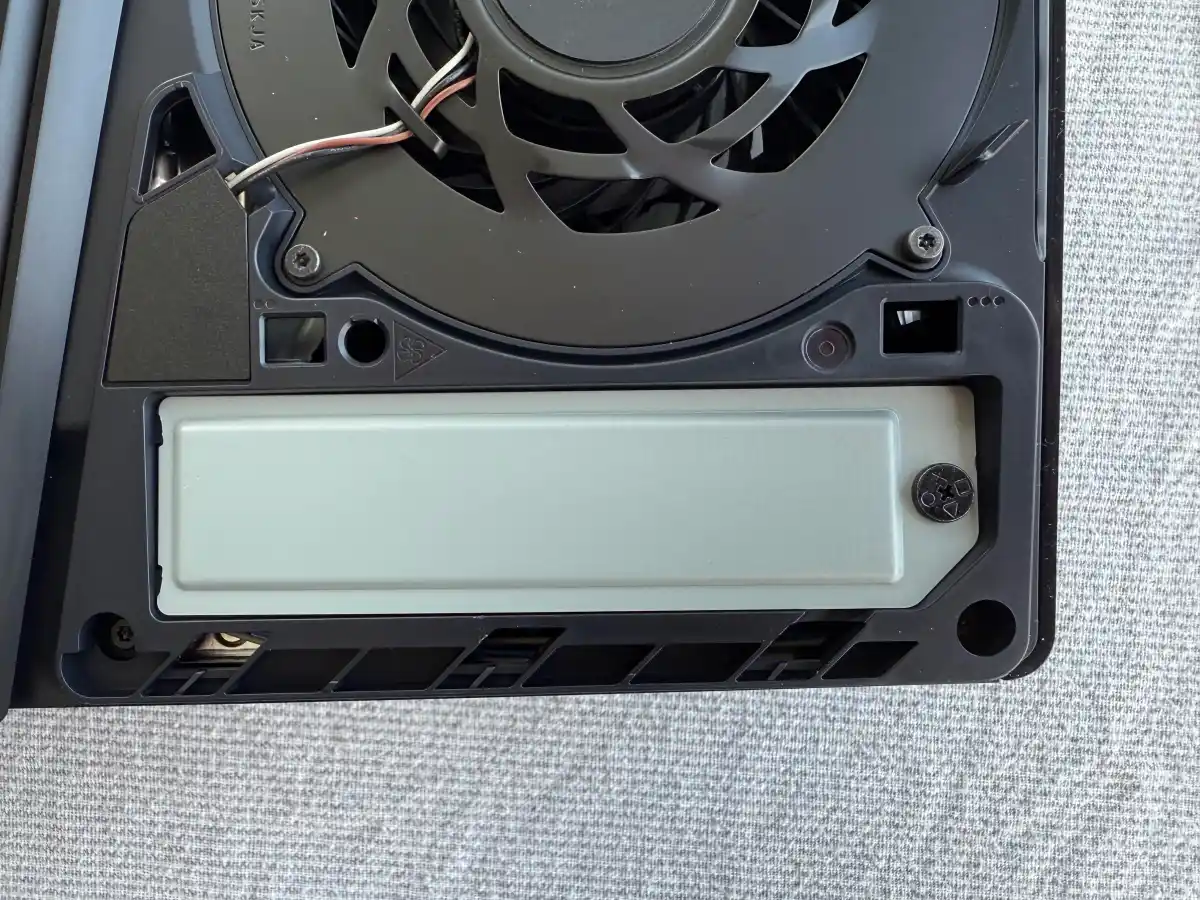
The now half naked console will reveal a vent and a silver-coloured plate. You want to remove the little plate by undoing the screw on the right. While you’re undoing the screw, admire that it has the little PlayStation symbols on it, it’s a nice touch.
Step 4: Move the spacer
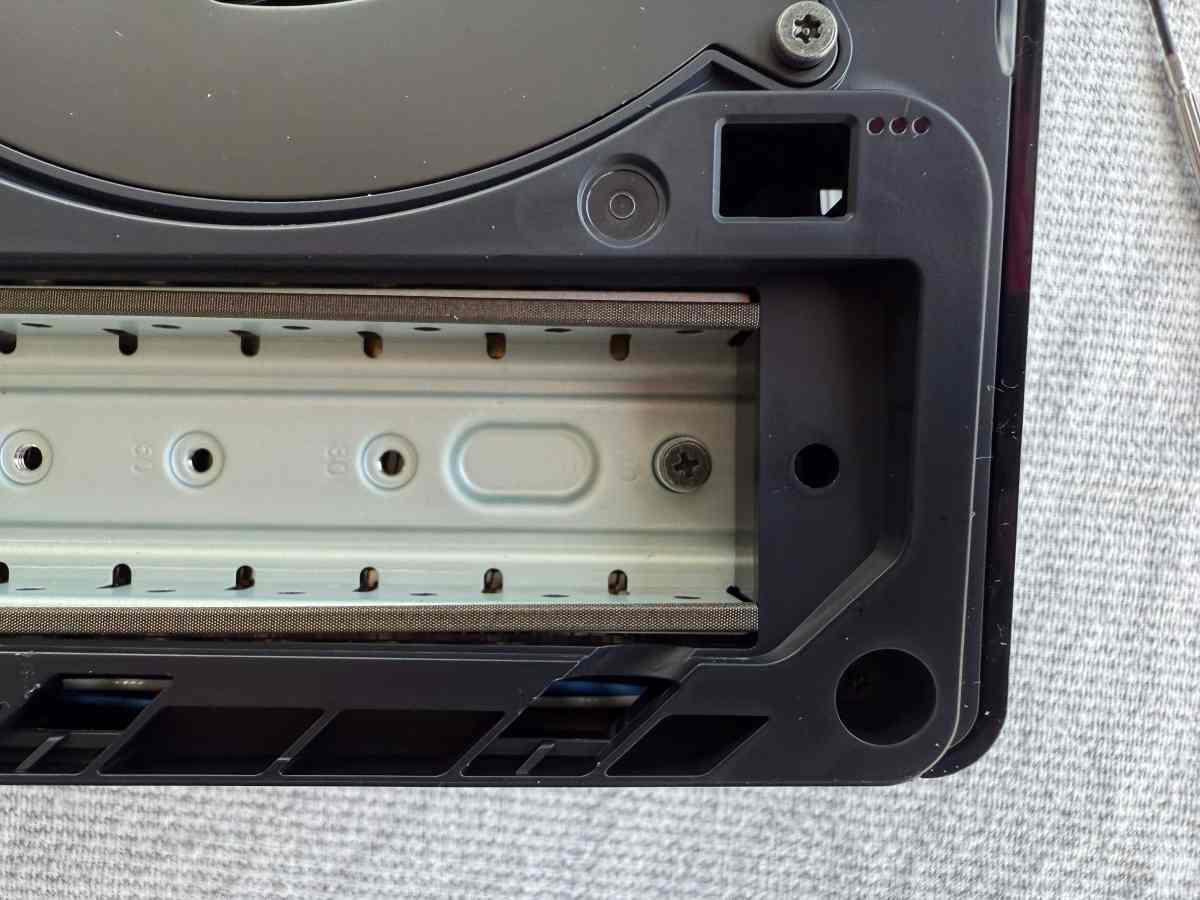
When the secrets of the PS5 Pro hard drive compartment are revealed, you’ll see a little screw and spacer on the right, undo the screw and (if you’re using the same size SSD as I am), move the spacer to the 80 spot, but don’t put the screw in yet.
Step 5: Align the prongs
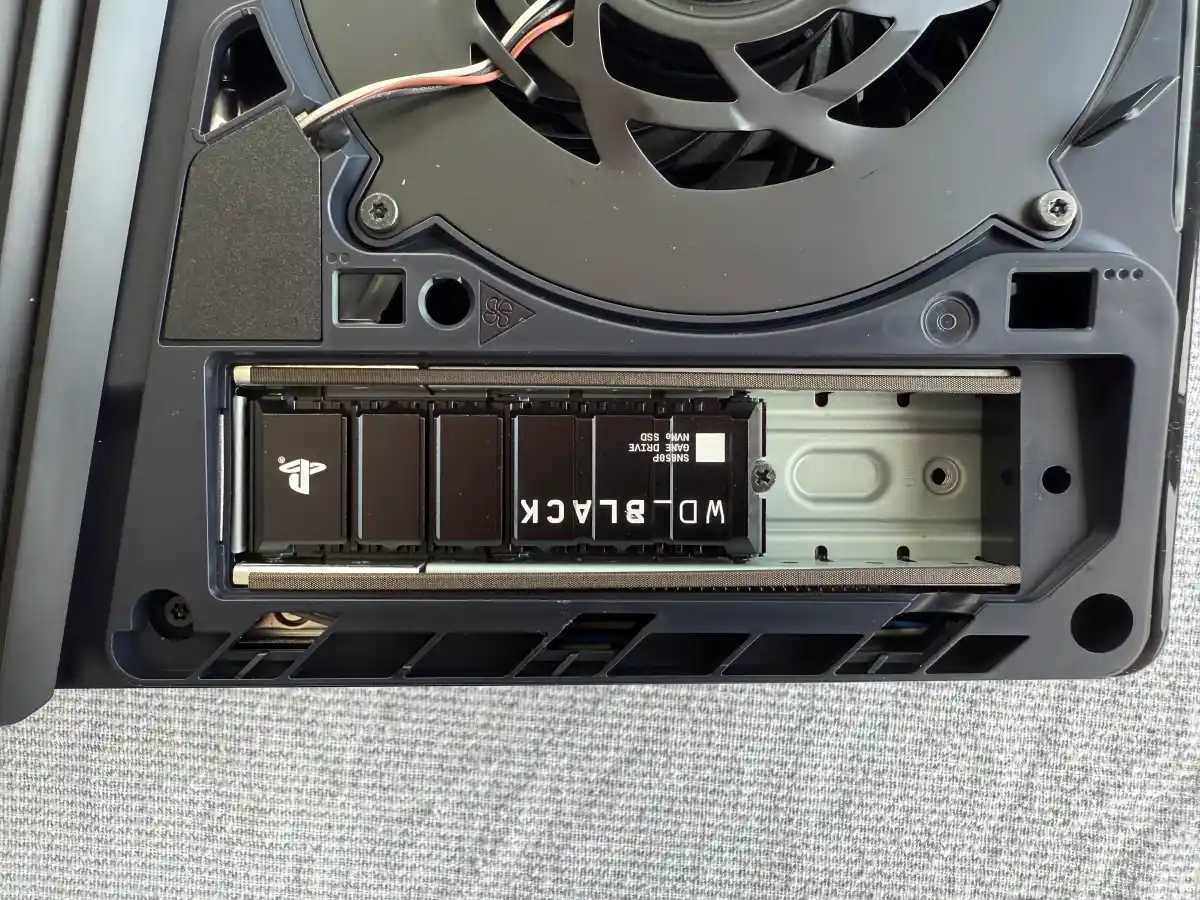
Take your M2 NVMe SSD out of the box and carefully plug the prongs into the lefthand side of the drive cavity. The little half-moon cutout for the screw at the back of the drive should line up with the 80 screw hole when it’s properly plugged in, but give it a gentle push again to make sure it’s properly in there before doing up the screw on the spacer, locking the drive in place.
Step 6: Pop the plate back on
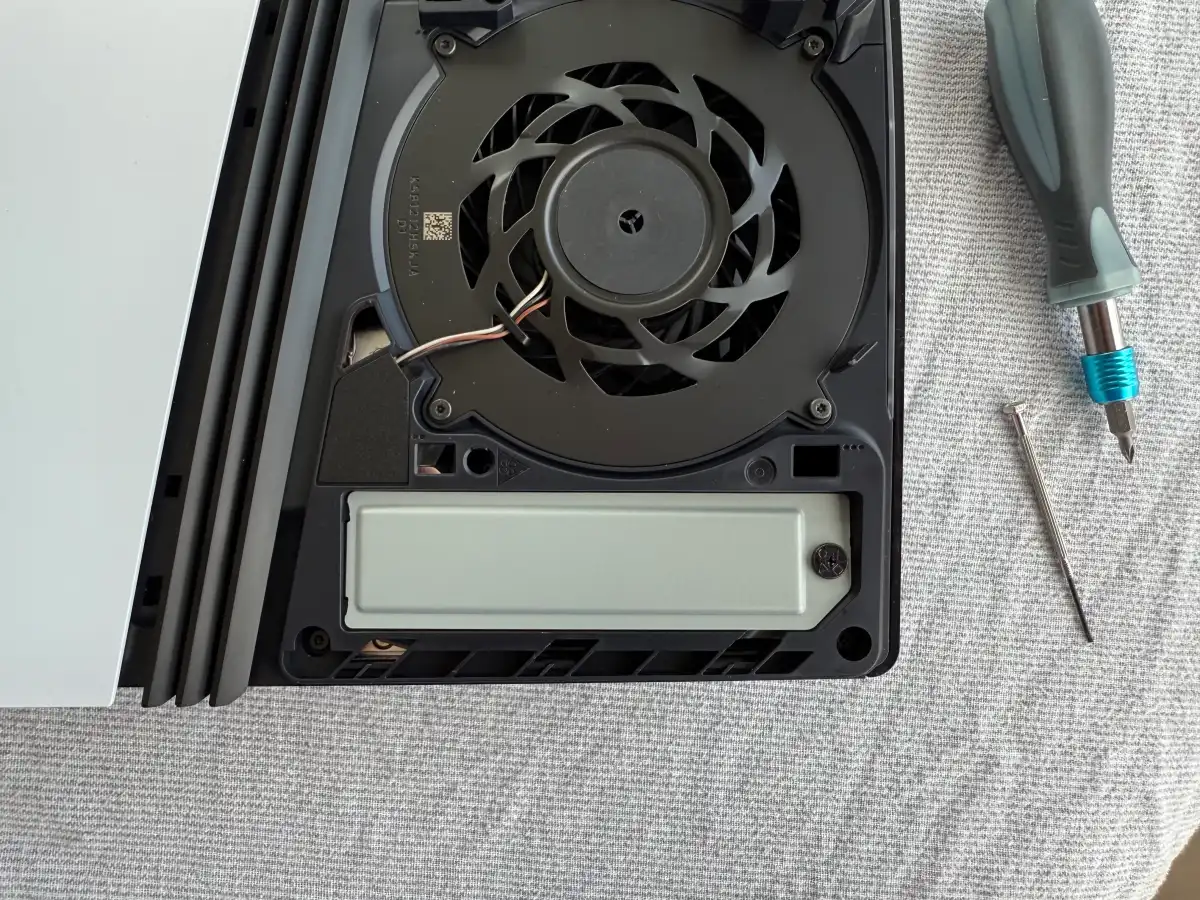
Then, put the little silver hat back on and screw it in, and put the case back on by lining up the little prongs and pushing until you hear the click.
Step 7: Format the drive
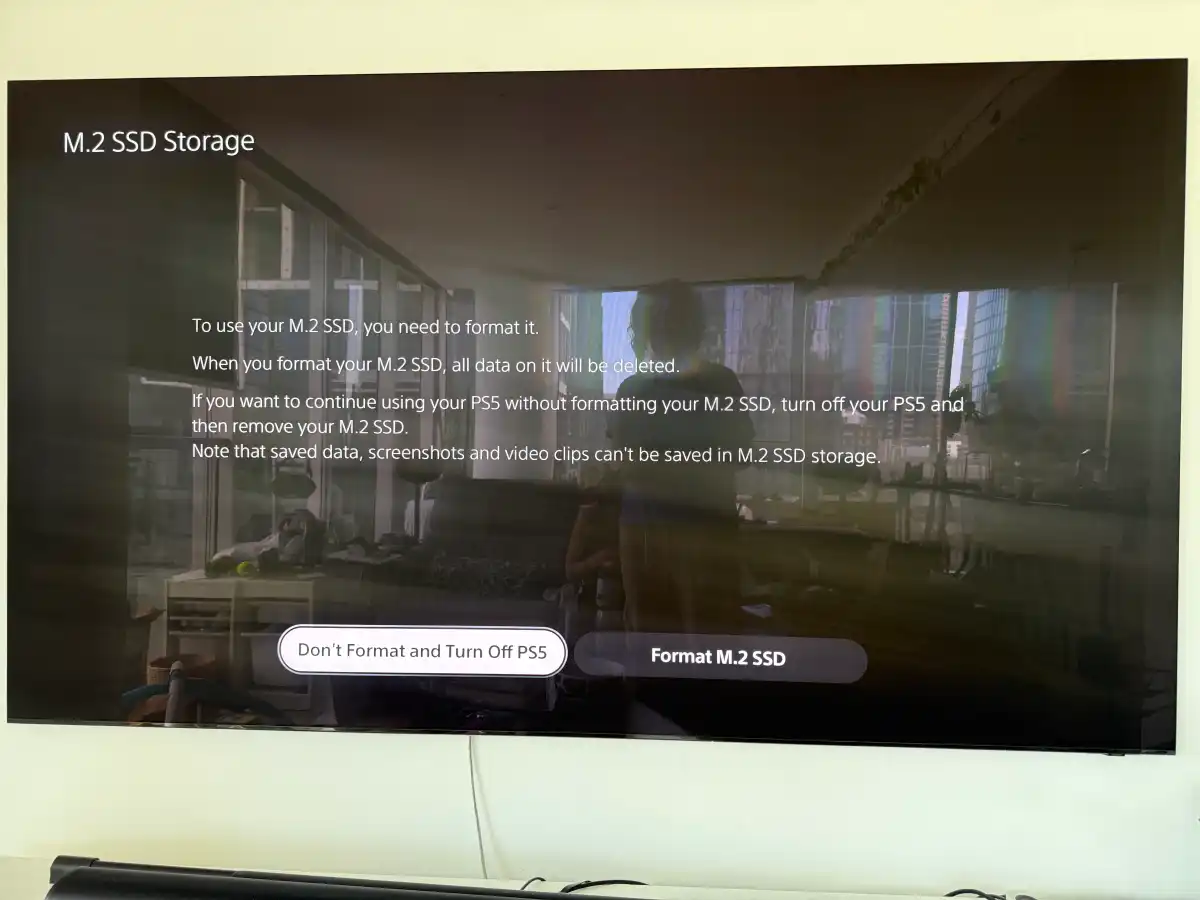
Plug the PS5 Pro into your TV, boot it up, and if you’ve used a new drive that hasn’t been used with a PS5 before, the console will ask you to format the drive to prepare it. Do that, and you’re good to go.
Step 8: Get downloading!
Download even more games and fill up the new drive as well. Enjoy!
